Sydney’s world-class museums offer incredible photography opportunities, but capturing their treasures requires specific techniques. These museum photography tips Sydney visitors should know will help you document your cultural experiences while respecting venue policies. From the Art Gallery of NSW to the Australian Museum, we’ll explore how to handle challenging lighting, avoid reflections, and create compelling compositions that do justice to Sydney’s artistic and historical collections.
Photography Rules in Sydney’s Major Museums
Before diving into technical advice, it’s essential to understand the photography policies at Sydney’s cultural institutions. Most museums allow non-commercial photography without flash, but specific rules vary by venue.
Photography policy sign at the Art Gallery of NSW
Art Gallery of New South Wales
The Art Gallery of NSW generally permits photography in permanent collection areas but restricts it in some temporary exhibitions. Always check signage for each gallery space, as rules may change based on the exhibition. Tripods and selfie sticks require prior permission from security staff.
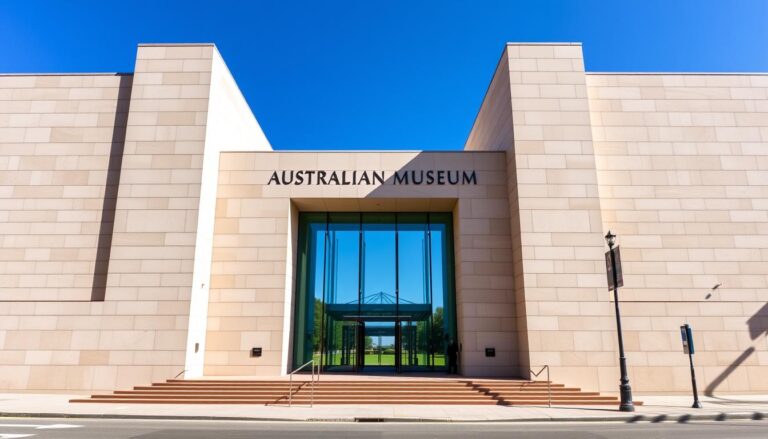
Australian Museum
The Australian Museum allows personal photography throughout most exhibits. Flash photography is prohibited near sensitive specimens and artifacts. The museum encourages sharing photos on social media with their hashtag #AustralianMuseum.
Museum of Contemporary Art
The Museum of Contemporary Art has varying photography policies depending on the exhibition. The permanent collection generally allows photography without flash, while special exhibitions may prohibit photography entirely. Check with staff upon entry or look for signage in each gallery.
Powerhouse Museum
The Powerhouse Museum permits photography for personal use throughout most exhibits. Some interactive displays and borrowed items may have photography restrictions clearly marked with signage.
Pro Tip: Always ask museum staff if you’re unsure about photography rules. Being respectful and informed will often earn you more photography freedom than assuming permissions.
Mastering Museum Lighting Challenges in Sydney
Sydney museums employ various lighting techniques to protect their collections while showcasing them effectively. Understanding how to work with these lighting conditions is crucial for successful museum photography.

Lighting conditions at the Australian Museum
Working with Low Light
Many Sydney museums maintain low light levels to protect sensitive artifacts. This creates challenges for photographers trying to capture sharp, well-exposed images. Here’s how to adapt:
Camera Settings for Low Light
- Increase your ISO (start at 800-1600 for most modern cameras)
- Use a wider aperture (f/2.8 or wider if your lens allows)
- Slow your shutter speed (try not to go below 1/60s handheld)
- Enable image stabilization if your camera/lens has it
- Consider shooting in RAW format for better post-processing flexibility
Stabilization Techniques
- Brace yourself against a wall or column when possible
- Hold your camera with proper technique (elbows tucked in)
- Use your camera’s burst mode to increase chances of a sharp shot
- Consider a monopod (if allowed) for extra stability
- Rest your camera on available surfaces when appropriate
Dealing with Mixed Lighting
Sydney museums often combine natural light with artificial lighting, creating white balance challenges. The Art Gallery of NSW, for example, uses a mix of natural light from skylights and directed spotlights on artwork.

Mixed lighting at the Museum of Contemporary Art
- Set a custom white balance using a neutral reference point
- Try the “Daylight” white balance setting as a starting point
- Shoot in RAW to adjust white balance in post-processing
- Consider using the Auto White Balance with mixed lighting
- Look for compositions where lighting is more consistent
“Museum lighting is deliberately designed to protect artifacts while highlighting their features. Understanding these lighting conditions is half the battle in museum photography.”
Essential Equipment for Sydney Museum Photography
Having the right gear can make a significant difference when photographing in Sydney’s museums. Here’s what to consider bringing on your next museum visit.

Recommended equipment for museum photography
Camera Selection
When choosing a camera for Sydney museum photography, consider these factors:
- Good high-ISO performance for low-light conditions
- In-body image stabilization if available
- Silent shooting mode to remain discreet
- Articulating screen for shooting at different angles
- Compact size to avoid drawing attention or bumping exhibits
Lens Recommendations
The right lens can make a significant difference in your museum photography results:
| Lens Type | Advantages | Best For |
| Fast Prime (35mm or 50mm f/1.8) | Excellent in low light, sharp images, compact | General museum photography, paintings, small exhibits |
| Wide Angle (16-35mm) | Captures large exhibits, architecture | Museum interiors, large installations, tight spaces |
| Standard Zoom (24-70mm) | Versatility for different subjects | Mixed museum environments, varied exhibits |
| Macro Lens | Captures fine details | Small artifacts, jewelry, intricate details |
Accessories Worth Bringing
These additional items can improve your museum photography experience:
Essential Accessories
- Lens cleaning cloth (for fingerprints on glass)
- Spare batteries (low light drains batteries faster)
- Memory cards with sufficient space
- Monopod (if allowed by the museum)
- Camera bag that allows quick, quiet access
Optional Accessories
- Polarizing filter (reduces reflections on glass)
- Small LED light (for reference only, not direct lighting)
- White/gray card for custom white balance
- Smartphone with museum apps installed
- Notebook for recording exhibit information
Sydney Museum Tripod Policies: Most Sydney museums prohibit full-sized tripods during regular visiting hours. The Powerhouse Museum occasionally allows tripods during special photography events. A monopod or small tabletop tripod is a better alternative for most situations.
Composition Techniques for Sydney Museum Photography
Creating compelling compositions in museum settings requires thoughtful framing and an understanding of how to work with the unique characteristics of museum spaces and exhibits.

Thoughtful composition at the Art Gallery of NSW
Framing Artwork Without Distortion
When photographing paintings and other flat artwork in Sydney museums, proper positioning is crucial to avoid perspective distortion:
- Position yourself directly in front of the artwork at its center
- Keep your camera sensor parallel to the artwork
- Stand far enough back to avoid using extreme wide angles
- Use a longer focal length and step back if possible
- Consider including frames if they complement the artwork
Capturing Three-Dimensional Objects
Sydney’s museums house many sculptures and 3D artifacts that require different compositional approaches:

3D object photography at the Australian Museum
- Walk around the object to find the most interesting angle
- Look for angles where museum lighting creates appealing highlights
- Consider shooting from slightly below for monumental effect
- Use depth of field creatively to emphasize certain features
- Include environmental context when it adds to the story
Working with Glass Cases and Reflections
Many exhibits in Sydney museums are protected by glass, creating reflection challenges:

Techniques for minimizing glass reflections
- Use a polarizing filter to reduce reflections
- Position your camera at an angle to the glass when possible
- Shield your lens with your hand or a lens hood
- Get close to the glass (without touching it)
- Wear dark clothing to minimize your own reflection
- Look for areas with less overhead lighting reflection
Important: Never touch museum glass with your hands or camera. This can damage exhibits and leave fingerprints that ruin others’ viewing experience. Always maintain a respectful distance from all museum objects.
Photography Tips for Specific Sydney Museums
Each of Sydney’s major museums presents unique photography opportunities and challenges. Here’s what to know about photographing in some of Sydney’s most popular cultural institutions.
Art Gallery of New South Wales

The grand exhibition space at Art Gallery of NSW
- Take advantage of the natural light in the Grand Courts
- Visit on weekday mornings for fewer crowds
- The Aboriginal and Torres Strait Islander galleries have specialized lighting
- Contemporary galleries often have more flexible photography policies
- Check temporary exhibition policies, which may differ from permanent collections
Australian Museum

Specialized lighting at the Australian Museum
- The First Nations galleries require respectful photography approaches
- Natural history exhibits often have dramatic spotlighting
- Mineral displays present challenging reflective surfaces
- The Pacific and Indigenous Australia galleries have varied lighting conditions
- The Westpac Long Gallery offers beautiful architectural elements
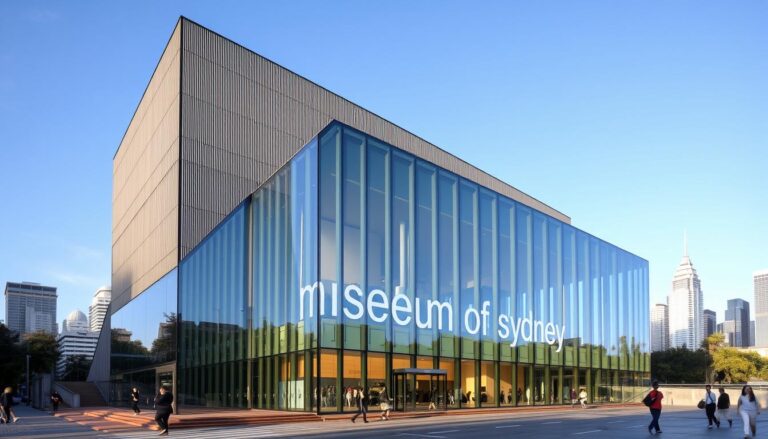
Museum of Contemporary Art

Exhibition space at the Museum of Contemporary Art
- Check photography permissions for each exhibition
- The harbor-facing windows create mixed lighting challenges
- Video installations require specialized camera settings
- The rooftop offers spectacular Sydney Harbour views
- Interactive installations may have specific photography guidelines
Major museums in Sydney’s cultural district
Post-Processing Tips for Museum Photography
Even with the best in-camera techniques, museum photographs often benefit from thoughtful post-processing to address lighting challenges and color accuracy issues.

Before and after post-processing of a museum photograph
Essential Adjustments for Museum Photos
Focus on these key adjustments to improve your Sydney museum photographs:
Color Correction
- Correct white balance to neutralize mixed lighting
- Adjust temperature and tint to match the original artwork
- Use the HSL panel to fine-tune specific colors
- Consider reference photos or museum catalog images
- Avoid oversaturation that misrepresents the original
Exposure and Contrast
- Recover shadow details without introducing noise
- Manage highlights to preserve texture
- Add clarity to enhance texture in sculptures
- Use graduated filters for unevenly lit large works
- Apply noise reduction for high-ISO images
Recommended Editing Software
These tools are particularly effective for museum photography post-processing:
- Adobe Lightroom – Excellent for color correction and batch processing
- DxO PhotoLab – Superior noise reduction for low-light museum shots
- Capture One – Exceptional color accuracy for artwork reproduction
- Affinity Photo – Affordable alternative with advanced editing capabilities
- Darktable – Free open-source option with powerful color tools

Editing workflow for museum photographs
“The goal of post-processing museum photographs isn’t to reinvent the artwork but to faithfully represent what you saw while overcoming the technical limitations of the camera.”
Museum Photography Etiquette in Sydney
Being a respectful photographer in Sydney’s museums not only follows proper etiquette but often results in better photography opportunities and experiences.

Demonstrating proper museum photography etiquette
Respecting Other Visitors
- Wait for your turn rather than pushing for a photo opportunity
- Be mindful of your position to avoid blocking others’ views
- Move efficiently when taking photos in crowded areas
- Keep your voice down when discussing photography
- Be especially considerate during guided tours
Protecting the Exhibits
- Never touch artwork or glass cases with your hands or equipment
- Maintain a safe distance from all exhibits
- Follow all museum guidelines about flash photography
- Be careful with backpacks and camera bags in tight spaces
- Report any concerns about exhibit safety to staff
Working with Museum Staff
- Ask permission when unsure about photography rules
- Thank staff who provide helpful information
- Comply immediately if asked to adjust your photography behavior
- Consider visiting during off-peak hours if you need more time
- Inquire about special photography sessions some museums offer
Remember: Museums exist primarily to preserve and share cultural heritage. Your photography should enhance this mission, not interfere with it. Always prioritize the preservation of exhibits and the experience of other visitors over getting the perfect shot.
Conclusion: Capturing Sydney’s Cultural Treasures
Sydney’s museums offer photographers a wealth of subjects that combine art, history, science, and culture. By applying these museum photography tips Sydney visitors can create meaningful images that document their experiences while respecting the museum environment.
Remember that successful museum photography balances technical skills with respectful behavior. Take your time to observe lighting conditions, choose appropriate camera settings, and find compelling compositions. Most importantly, remain mindful of other visitors and the preservation needs of the exhibits.
The photographs you create in Sydney’s museums will serve as personal mementos of your cultural experiences and may inspire others to explore these incredible institutions. Share your images responsibly, always crediting the museum and artists when appropriate.
Ready to Improve Your Museum Photography?
Download our free “Sydney Museum Photography Cheat Sheet” with at-a-glance settings, composition tips, and venue-specific advice for Sydney’s top museums.
Are tripods allowed in Sydney museums?
Most Sydney museums prohibit full-sized tripods during regular visiting hours. The Art Gallery of NSW and Australian Museum occasionally allow tripods during special photography events or with prior permission. A monopod or small tabletop tripod is generally a better alternative for most situations. Always check with the specific museum before your visit.
What’s the best camera for museum photography in Sydney?
The best camera for Sydney museum photography is one with good low-light performance (high ISO capabilities), in-body image stabilization, and relatively compact size. Mirrorless cameras are particularly well-suited due to their silent shooting modes and electronic viewfinders that show exposure in real-time. However, any camera with manual controls can work well with proper technique.
How can I avoid reflections on glass cases in museums?
To minimize reflections on glass cases in Sydney museums: 1) Use a polarizing filter, 2) Position your camera at an angle to the glass, 3) Shield your lens with your hand or lens hood, 4) Get close to the glass without touching it, 5) Wear dark clothing to reduce your reflection, and 6) Look for areas with less overhead lighting reflection.